
The word "POV" made with one polygon statement.
Almost every object can be approximated using triangles but we may need a lot of triangles to create more complex shapes. Thus we will only create a very simple mesh example. This example will show a very useful feature of the triangles meshes though: a different texture can be assigned to each triangle in the mesh.
Now let's begin. We will create a simple box with differently colored sides. We create an empty file called meshdemo.pov and add the following lines.
We must declare all textures we want to use inside the mesh before the mesh is created. Textures cannot be specified inside the mesh due to the poor memory performance that would result.
Now we add the mesh object. Three sides of the box will use individual textures while the other will use the global mesh texture.
Tracing the scene at 320x240 we will see that the top, right and front side of the box have different textures. Though this is not a very impressive example it shows what we can do with mesh objects. More complex examples, also using smooth triangles, can be found under the scene directory as chesmsh.pov and robotmsh.pov.
A polygon is defined by a number of points that describe its shape. Since polygons have to be closed the first point has to be repeated at the end of the point sequence.
In the following example we will create the word POV using just one polygon statement.
We start with thinking about the points we need to describe the desired shape. We want the letters to lie in the x-y-plane with the letter O being at the center. The letters extend from y=0 to y=1. Thus we get the following points for each letter (the z coordinate is automatically set to zero).
Letter P (outer polygon):
    <-0.8, 0.0>, <-0.8, 1.0>,
    <-0.3, 1.0>, <-0.3, 0.5>,
    <-0.7, 0.5>, <-0.7, 0.0>

Letter P (inner polygon):
    <-0.7, 0.6>, <-0.7, 0.9>,
    <-0.4, 0.9>, <-0.4, 0.6>

Letter O (outer polygon):
    <-0.25, 0.0>, <-0.25, 1.0>,
    < 0.25, 1.0>, < 0.25, 0.0>

Letter O (inner polygon):
    <-0.15, 0.1>, <-0.15, 0.9>,
    < 0.15, 0.9>, < 0.15, 0.1>

Letter V:
    <0.45, 0.0>, <0.30, 1.0>,
    <0.40, 1.0>, <0.55, 0.1>,
    <0.70, 1.0>, <0.80, 1.0>,
    <0.65, 0.0>
Both letters P and O have a hole while the letter V consists of only one polygon. We'll start with the letter V because it is easier to define than the other two letters.
We create a new file called polygdem.pov and add the following text.
As noted above the polygon has to be closed by appending the first point to the point sequence. A closed polygon is always defined by a sequence of points that ends when a point is the same as the first point.
After we have created the letter V we'll continue with the letter P. Since it has a hole we have to find a way of cutting this hole into the basic shape. This is quite easy. We just define the outer shape of the letter P, which is a closed polygon, and add the sequence of points that describes the hole, which is also a closed polygon. That's all we have to do. There'll be a hole where both polygons overlap.
In general we will get holes whenever an even number of sub-polygons inside a single polygon statement overlap. A sub-polygon is defined by a closed sequence of points.
The letter P consists of two sub-polygons, one for the outer shape and one for the hole. Since the hole polygon overlaps the outer shape polygon we'll get a hole.
After we have understood how multiple sub-polygons in a single polygon statement work, it is quite easy to add the missing O letter.
Finally, we get the complete word POV.
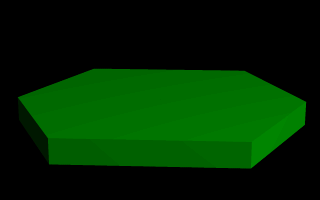
This produces a hexagonal polygon, which is then swept from y=0 through y=1. In other words, we now have an extruded hexagon. One point to note is that although this is a six sided figure, we have used a total of seven points. That is because the polygon is supposed to be a closed shape, which we do here by making the final point the same as the first. Technically, with linear polygons, if we didn't do this, POV-Ray would automatically join the two ends with a line to force it to close, although a warning would be issued. However, this only works with linear splines, so we mustn't get too casual about those warning messages!